Unpublished Drafts From The MARTINCOONEY.COM Archives
~ ~ ~
COLLECTION SERIES MARBLE SCULPTURE
My Carving Bowl Technique Explained
~ ~ ~
Please Click on a Photo to Enlarge

While I certainly didn’t intend to photograph the creation of every sculpture in the 1314 Winter Collection to the degree that I captured this big, deep Curvilinear Colorado Yule Marble Bowl, I thought it might be interesting to slip my camera into a ziplock bag and use it to take periodic photographs of the work at it progressed.
If you watched the video you will already have seen the process of transforming a rectangular block of Colorado Yule Marble into one of my signature Curvilinear Bowls but I present the following photographs and accompanying text as way of an insight into the technique I have developed in order to create my Reductionist Sculpture. With a deep bowl such as this I remove roughly 80 to 90 percent of the original material, a labor intensive activity that necessitates I work as swiftly, accurately and productively as humanly possible.

It’s quite unusual for me to carve a bowl from a squared, six-sided-sawn block, in fact this was the first time I’d ever done so now that I come to think about it. Usually I am facing a piece of marble that I have split from a much larger block, but block or split piece the first task is to establish the top, as this will form the all important rim, and so I work the surface to rid myself of the layer of dubious stone that forms the ‘rind’, as I call it, loaded as it is with all the damage incurred on its long and often tortuous journey from the saw to my banker.

The next task is to mark up the newly honed surface using a scribe, in order to cut the surface tension. I then follow the lines with a sharp pencil. This is a very important detail as pencil lines alone will tend to be obliterated once work commences, and the cut will produce a ragged unclean edge.

Once the rim is marked out it’s time to set about removing the interior of the bowl. These marks do not have to be precisely regular but I have found that 2 inch segments proves the ideal size.

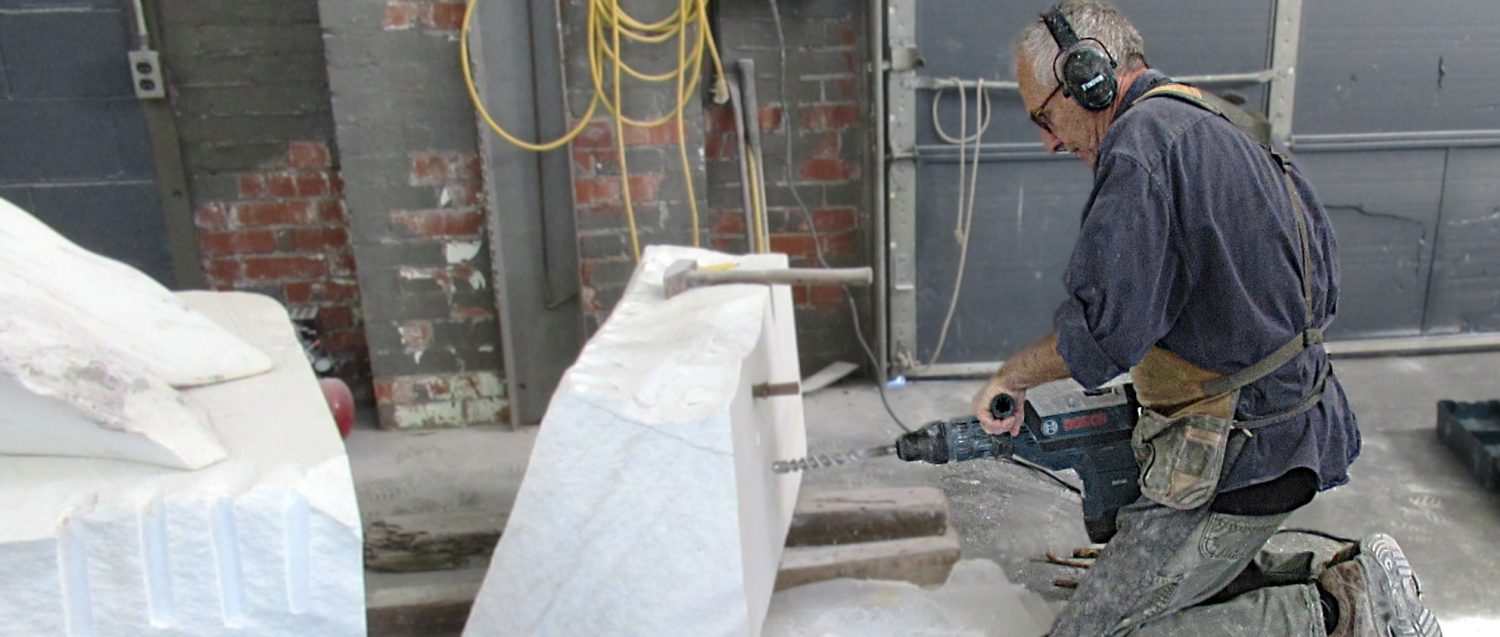
Now its time to drop the diamond blade into the lines and methodically make each cut in logical procession.

Fortunately the curved shape of the blade facilitates the creation of the bowl’s interior walls, but great care must be taken at this stage not to run too close to the scribed-in edges of the rim, for obvious reasons !

I now sink the grinder all the way down to the hilt – those scratches on the surface ensure that the blade is cutting deep so that the successive layers will be much more consistent and therefore far easier to remove.

Next I run a small blade around the scribed line, protecting the delicate rim at all cost. Once I am confident I can remove the outer pieces without compromising the rim, I gently tap them out with a chise, from which point it immediately becomes easy to pop out the rest of the blocks with a single blow to the base of each 2 inch cube – a strangely satisfying experience in my opinion.

Out they come – one at a time. Pop, pop, pop pop pop.

Just as with the large quarries – they use practically the same technique to remove their monster 20, 30, 50 ton block (and more sometimes) one by one – my little 2 inch blockettes succumb to a single blow, delivered with just enough (and not an ounce more) weight to pop them out. Needless to say I never direct a blow that will transfer into, and therefore shatter, the walls of a bowl.

Now that the first layer is out it’s time to repeat the process using the ghosts of the removed blockettes as a guide – this is where it pays to make sure the first row of cuts was evenly deep – as deep as the hilt of the 7 inch grinder will sink.

Again I drop the saw as deep as possible, cutting straight even lines. It’s at this point that the bowl slowly begins to take shape as the interior walls begin to form. Believe it or not this is perhaps the most crucial stage of the entire process as the very shape of the bowl is now being created – the exterior walls of course follow the contours of the inner. This process is then repeated until the interior of the bowl is completely roughed out.

~ ~ ~
~ ~ ~

~ ~ ~

~ ~ ~
~ ~ ~
My Yule Marble Bowl Carving Technique Explained: with Video
~ ~ ~
thanks for visiting martincooney.com
~ ~ ~
⌈∨⌉∧®±ιℵ
• ⌈ ~